

Getting started
Ver.iD lets your customers use digital identity wallets to share trusted information with your platform. You can use these interactions for three common journeys:
- Authentication: Let customers securely sign in with a digital identity wallet.
- Onboarding: Collect verified customer information for processes such as Know Your Customer (KYC) or Know Your Business (KYB).
- Issuance: Place a digital credential, such as a membership or qualification, in a customer's digital identity wallet.
This guide focuses on onboarding. You will create a disclosure in Ver.iD Studio, configure it to request an attribute such as a full name from a digital identity wallet, and test the complete customer journey without writing code. The same concepts will help you create authentication and issuance flows later.
The customer journey
For this guide, you will use the Ver.iD Gateway, our hosted interaction. Your application starts an OAuth request and receives the result at a configured redirect URI. In between, the Gateway shows your brand, explains which information is being requested, and lets your customer choose one of the digital identity wallets you configured.
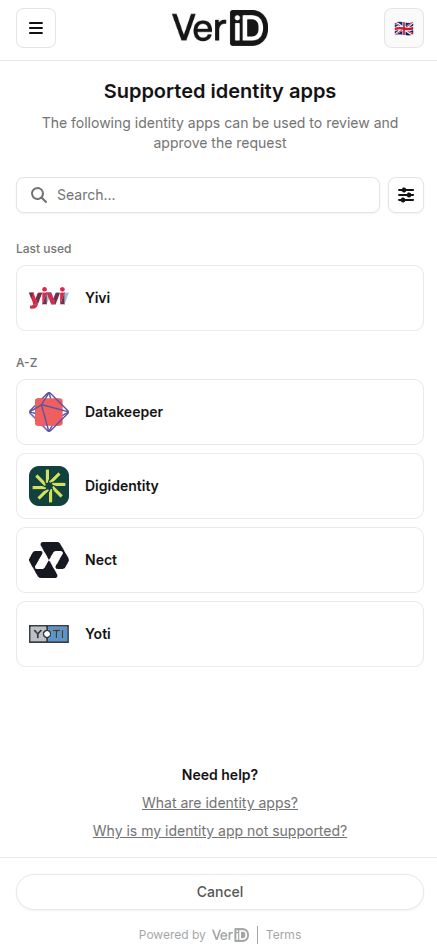
The Ver.iD Gateway lets your customer pick their own digital identity wallet to approve a request.
Get access to Studio
Request access to Studio to create and manage flows for your organization. If you can already sign in, you can skip this step. You can also invite other users when colleagues need access to the same organization.
Set up your organization
Before integrating a flow into your application, add and validate your domain. Studio uses active domains to ensure that results are returned only to approved redirect URIs.
You will also add your brand, including your registered legal name and logo. The brand identifies your organization to customers while they review and approve a request in the Gateway.
Create your first disclosure
A disclosure defines which digital identity wallets your customers can use, which attributes you request, which brand they see, and where Ver.iD sends the result. Follow Create a disclosure to configure and activate your first flow.
Once it is active, test the disclosure with the OAuth Debugging Tool. This lets you experience the flow as a customer and inspect the result before connecting it to your application.
Continue your integration
The next steps explain how to expand your disclosure, create a consistent result with mappings, and connect the flow to your own application. If you are ready to start integrating immediately, go to Start a disclosure.